2024 March
SQL Developer - Import Data Pump Dump Files into Autonomous Database

As seen in my other articles, there are several ways to import data pump files into an autonomous database. In this post we are going to see how to import a dump file into an autonomous database instance using the popular SQL Developer. This is going to be a appealing for those who prefer a GUI-led process which may be ideal for those less experienced with the commands necessary to achieve the same.
In this exercise, we've already taken an export of the 'HR' schema of a source database and uploaded that to the 'Test_BKT' bucket in OCI. We've also provisioned the target Autonomous Database instance, into which we'll be importing the HR schema from the Test_BKT bucket. The landing zone (networking, compartments, policies etc ) have already been prepared.
As mentioned in the introduction, for this exercise, we have the following;
A SQLDev_BKT storage bucket
A data pump dump file 'EXPDAT01-13_53_25.DMP' in the SQLDev_BKT bucket. We'll import the HR schema.
An Autonomous Transaction Processing (ATP) database instance
SQL Developer on Windows
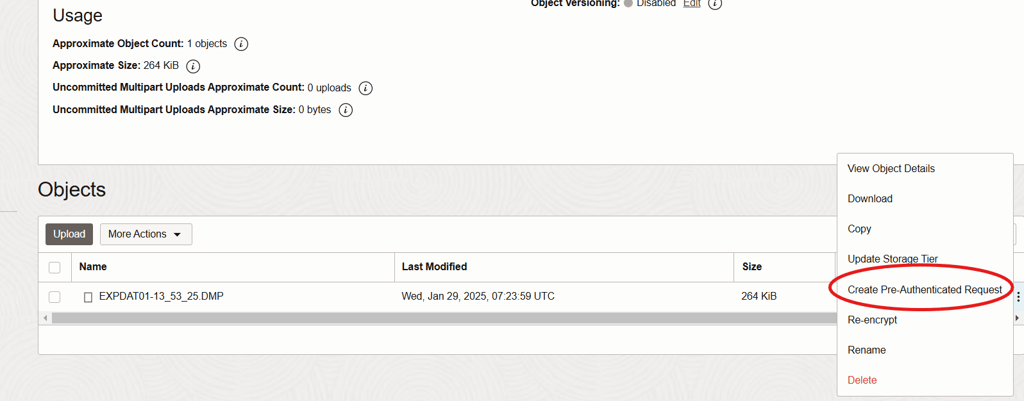
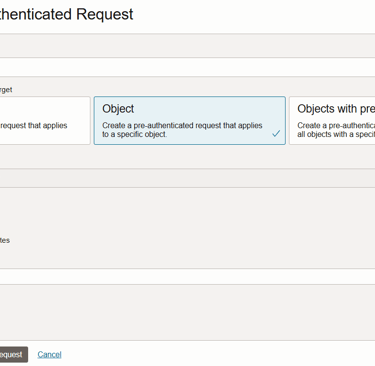
We will first need to create a pre-authenticated request of the dump file in the object storage to allow SQL Developer access this dump file. In the SQLDev_BKT, locate the EXPDAT01-13_53_25.DMP dump file and click on the three buttons on the extreme right and select 'Create Pre-Authenticated Request'
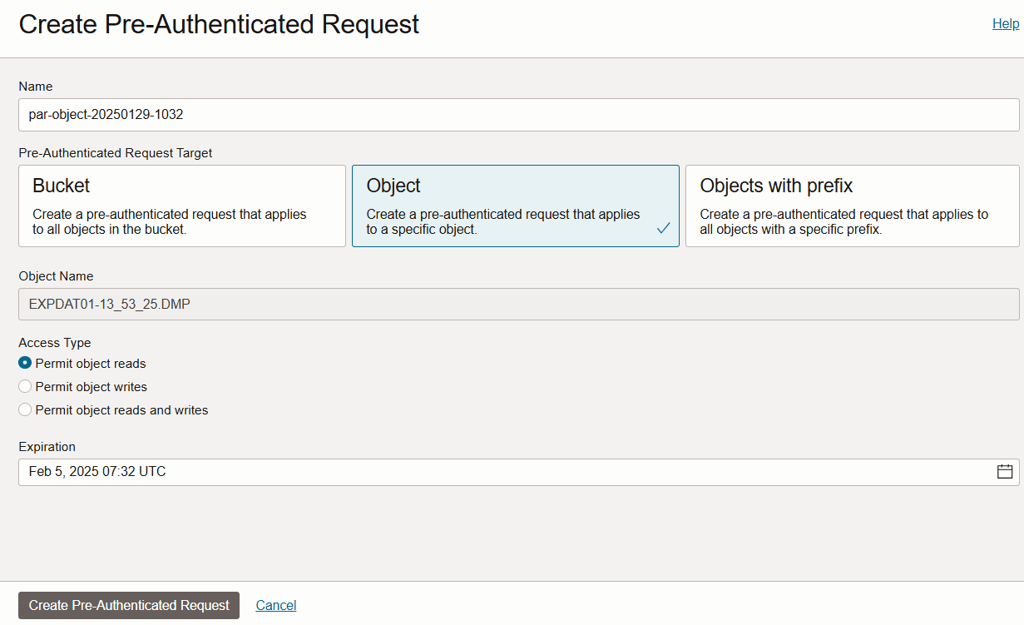
For security purposes, be careful to only create pre-authenticated requests for only the objects desired, in this case, only our dump file, however you can also create one for an entire bucket, which comes in handy when you have more than one dump file. Leave everything else as the default and click to create.
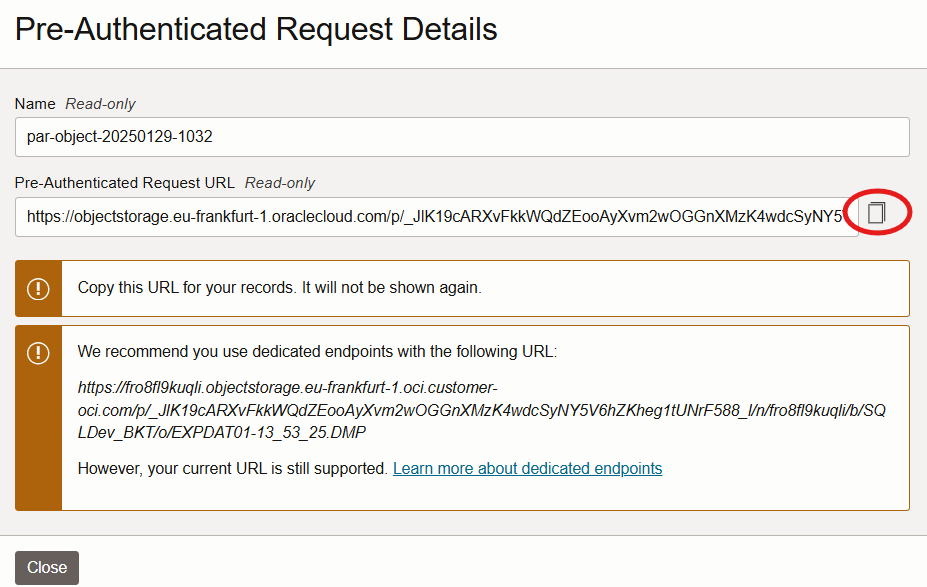
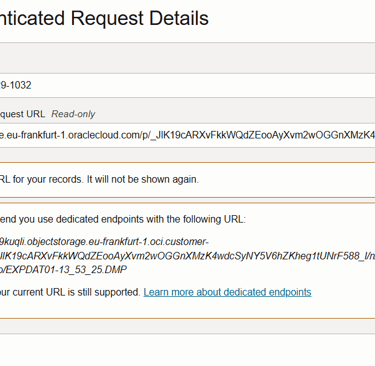
Copy the pre-authenticated URL generated on some text pad somewhere. We'll need this later in the exercise.
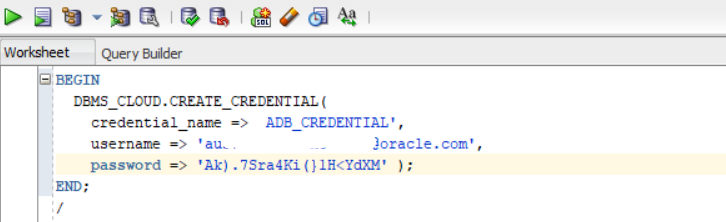
Next we need to create a credential in the autonomous database that will be used to authenticate to the dump file in the object storage using the URL above. Without this, the autonomous database and thus IMPDP isn't able to access the dump file. You create the credential using the DBMS_CLOUD.CREATE_CREDENTIAL procedure using the below syntax;
BEGIN
DBMS_CLOUD.CREATE_CREDENTIAL(
credential_name => 'credential_name',
username => '******@***.com',
password => 'auth_token' );
END;
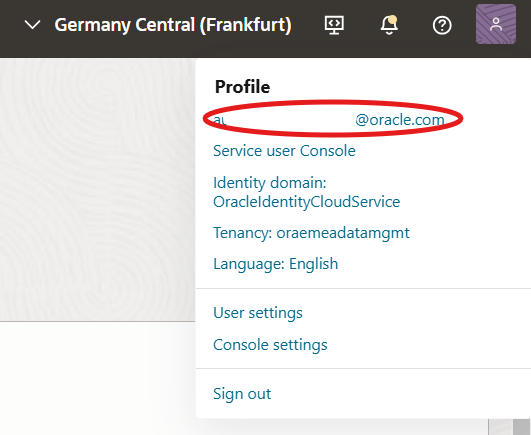
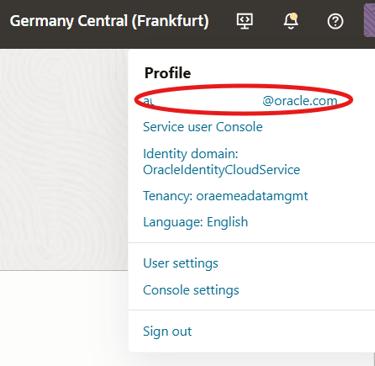
As you can see, we'll need the above parameters before we can create our credential. The name can be anything you wish to name your credential. In this case, we'll call our 'ADB_CREDENTIAL'. Our username is the logged user on OCI who's going to perform the import job. Click your profile tab on the extreme right at the top of the OCI console as shown below.
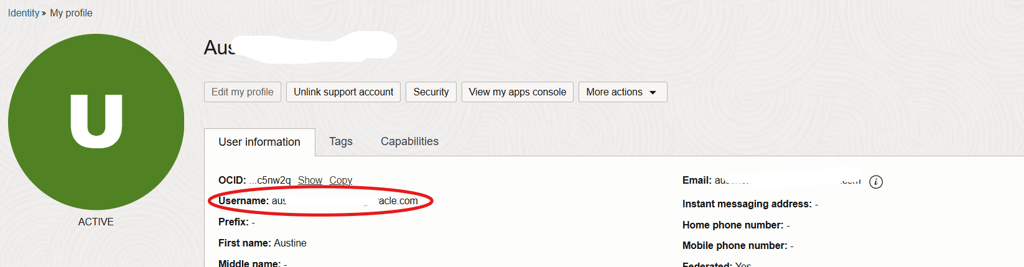
Then click on your username, which is your email address under the profile
You can see your username below. Take note of that, we'll need it to create our credential.
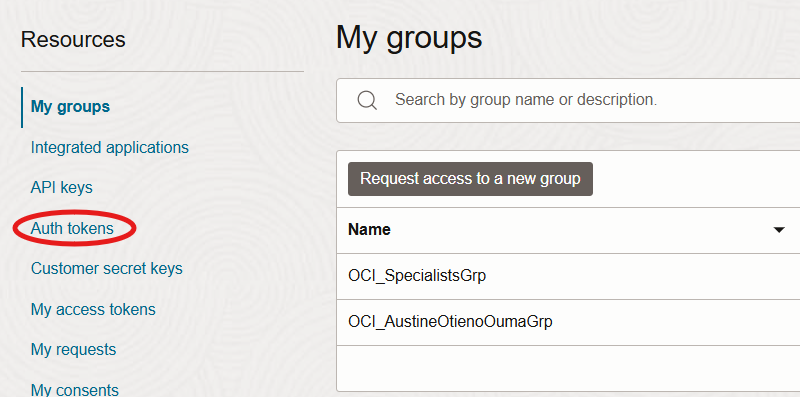
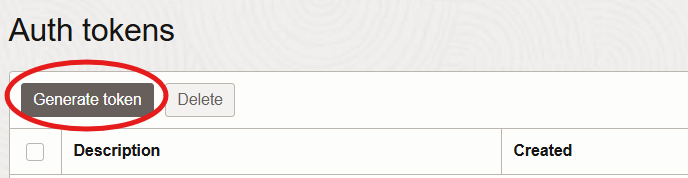
Next we'll generate the password needed by the credential. To do that, under 'Resources' in our profile, click on 'Auth Tokens'. This is on the same page above, where we identified our username.
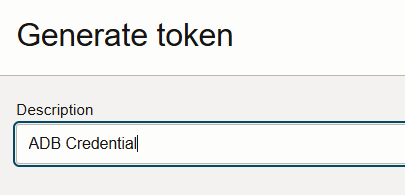
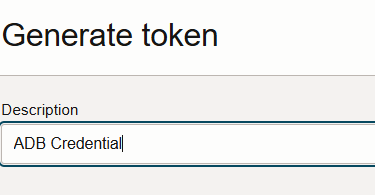
Click the 'Generate Token' button to generate a token and give a description of the token you're generating as shown below.
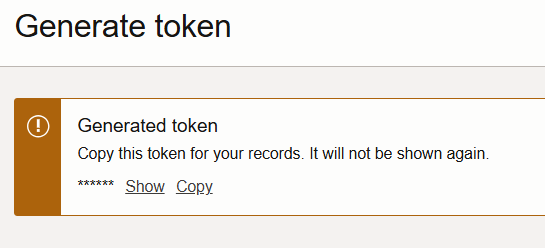
Take note that the credential is only shown once. Copy it in some text pad somewhere as we'll need it also to create our credential.
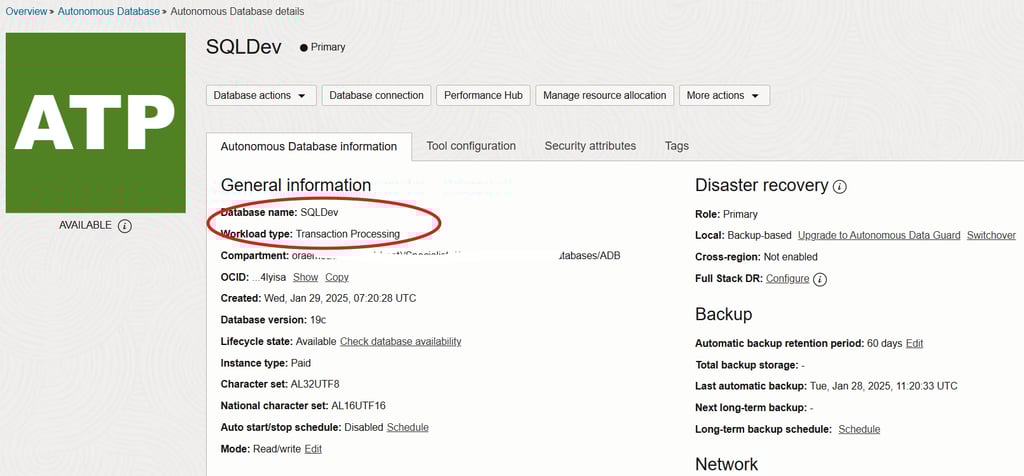
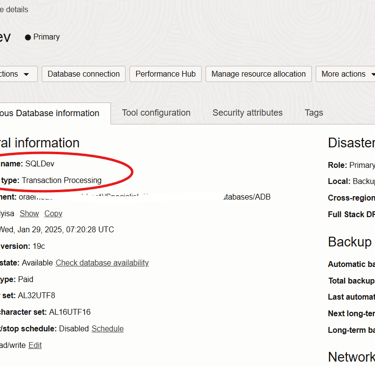
Now that we have all the necessary parameters to create our credential, we're going to log in to our target autonomous database instance to create the credential. We could do this in the cloud shell, or SQL Developer Web on the console, however since we're using the local SQL Developer in this exercise, I might as well execute the CREATE_CREDENTIAL procedure there. Before I do this, let's look at some details of our target ADB instance. As mentioned before, the DB name is SQLDev and of type Transaction Processing.
Next we log on to our ADB instance on SQL Developer and execute the create credital procedure to create our credential. We'll have the username and auth token we genrated earlier in the parameters as shown below.
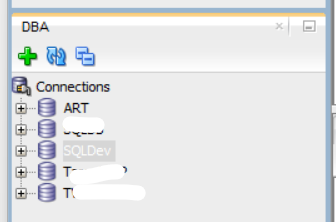
With our credential created, on SQL Developer we'll now launch the Data Pump Wizard to perform the import into the connected ADB instance. To do this, on the SQL Developer menu bar, click on 'View' and 'DBA' to launch the DBA tab from where we can launch the Data Pump Wizard.
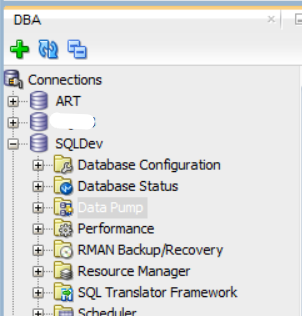
Click on the '+' next to the SQLDev DB name to expand it and then select 'Data Pump' as shown below.
Right click on 'Data Pump' and launch the Data Pump Import Wizard as shown below.
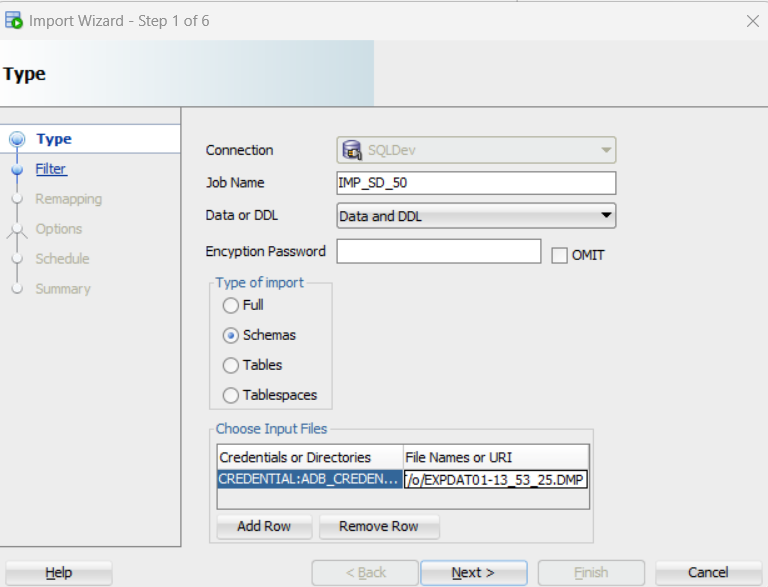
Select the type of import you want to do. In this case, we'll be doing a schema based import. Then under 'Credentials or Directories', replace the 'DATA_PUMP_DIR' with the ADB_CREDENTIAL we just created by selecting it in the drop-down menu. Under 'File Names or URI', paste the pre-authenticated URL we had created earlier. Leave everything else as is and click next.
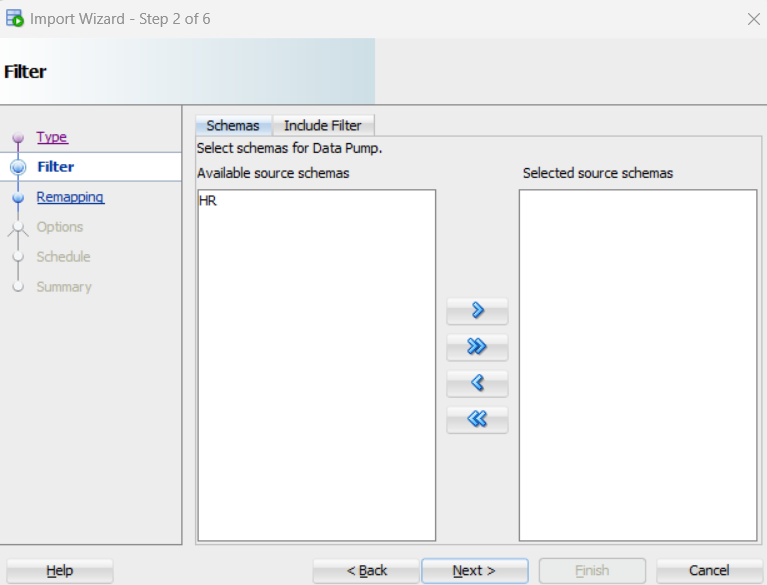
If everything is OK and our credentials and URIs are working, then in the next screen, after clicking next, we should be able to see our schemas in the dump file as below. If not, check that your pre-authenticated request is still valid and has not expired or your using the correct auth token. Move your selected schema, in this case HR to the 'Selected Schemas' and Click next. On the 'Remap Screen' leave everything as is or make changes as you deem appropriate.
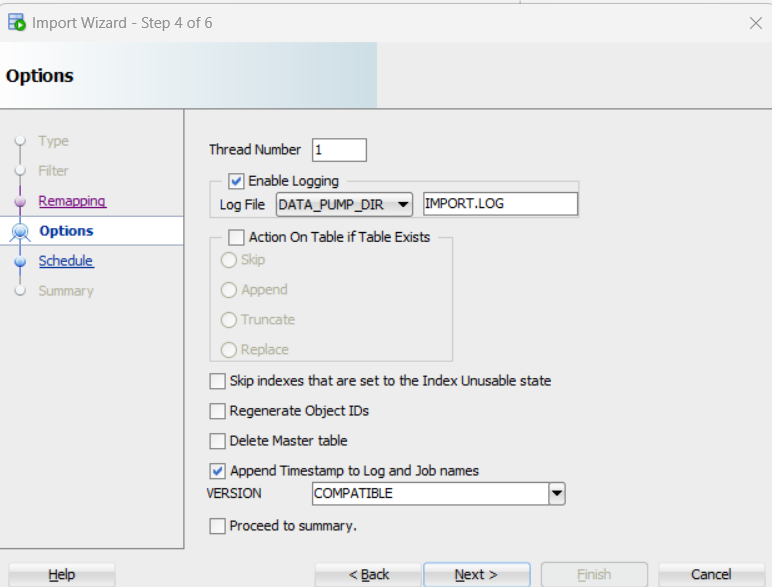
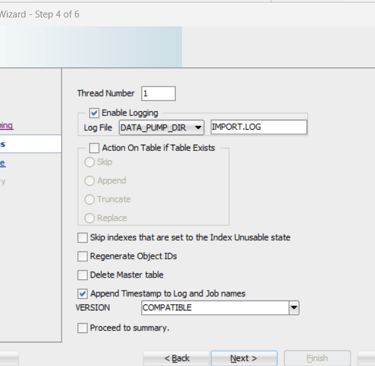
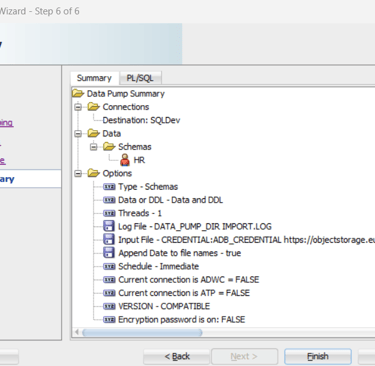
On the 'Options' screen, make changes as you deem necessary. I'll leave everything as is. You may want to change the parallel parameter, which for ADB is 0.25 * ECPUs assigned or equivalent to the OCPUs assigned. Click Next to schedule the job or run it immediately and in the next screen, confirm your choices in the summary.
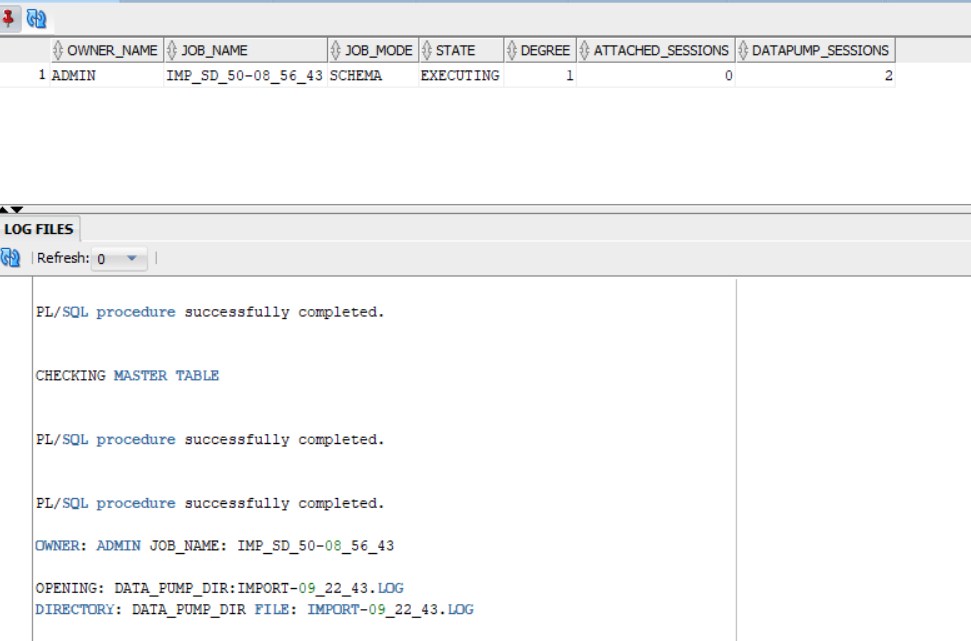
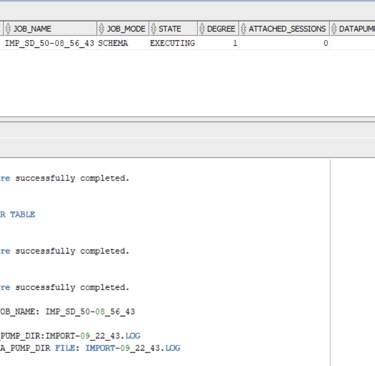
Click on Finish to run the job. You'll see the job executing as below.
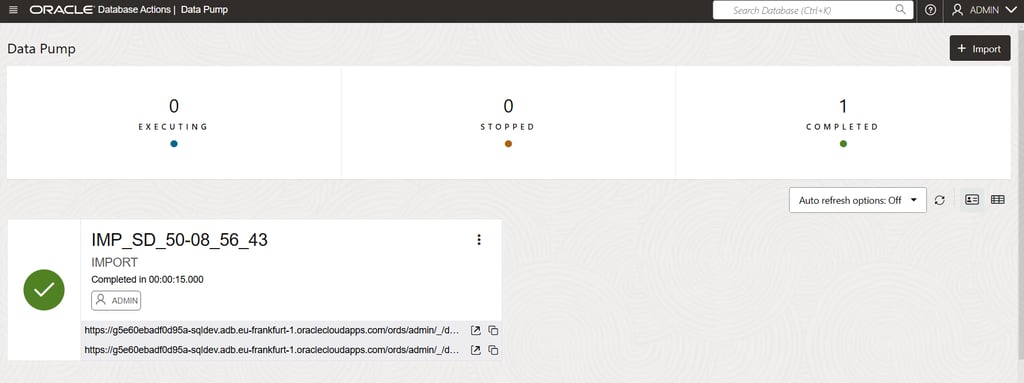
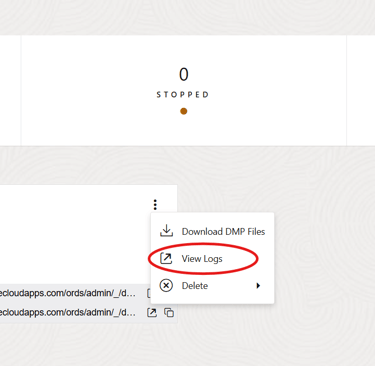
And on 'Database Actions' on the Autonomous Database console on OCI, the progress will also be shown either as 'EXECUTING', 'STOPPED' or 'COMPLETED' as shown below.
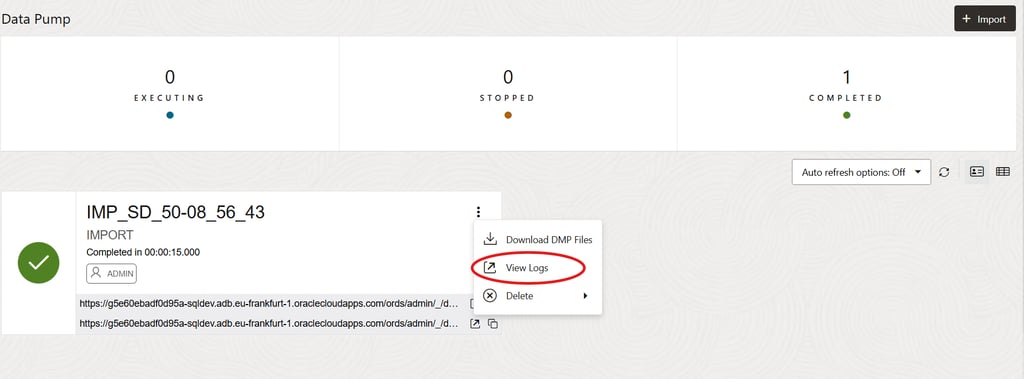
You can click on the three buttons to display a menu from which you can 'View Logs' as shown below;
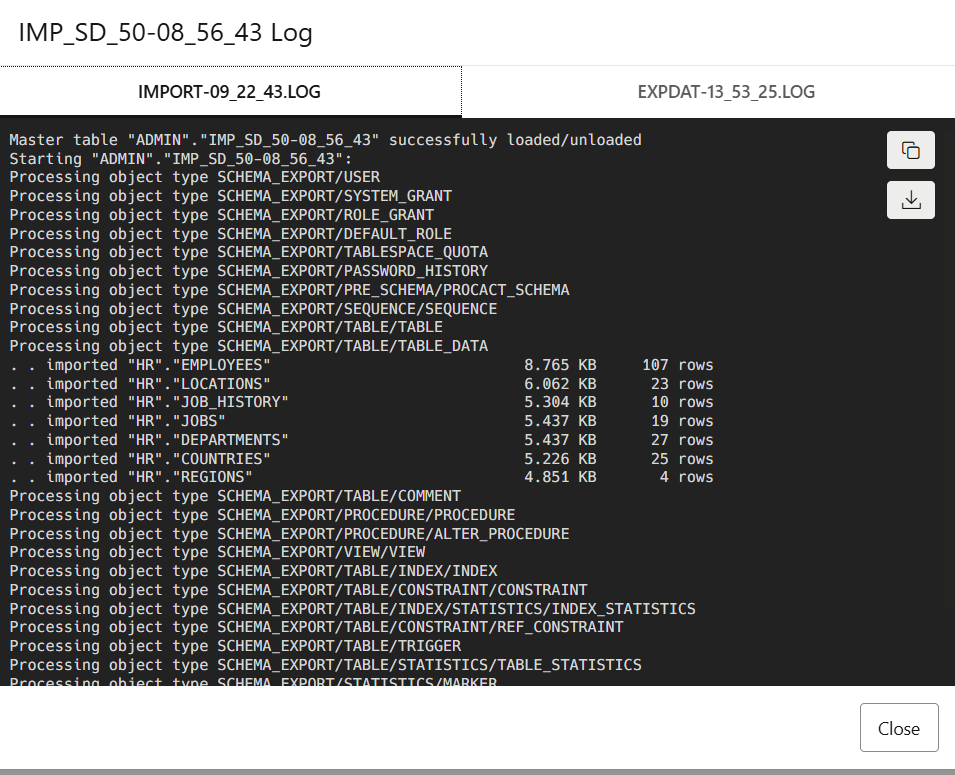
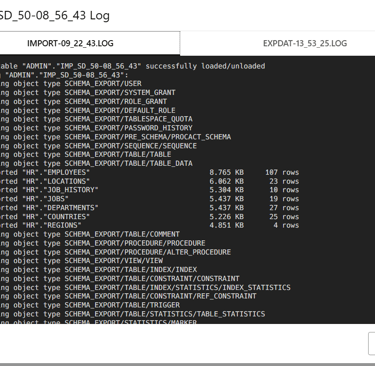
Clicking on view logs will display the familiar data pump logs as shown below from where you can confirm if everything is OK.
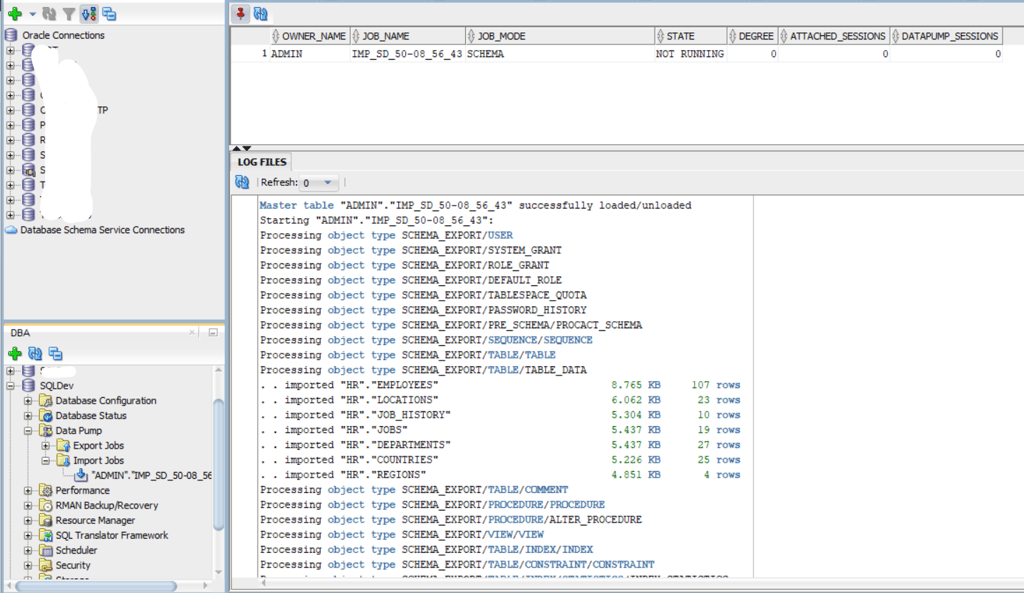
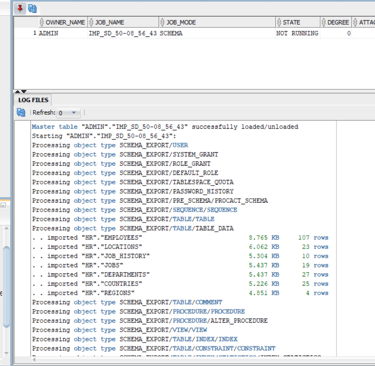
You can also view the logs on SQL Developer by expanding Data Pump by clicking on the '+' and then clicking the '+' sign next to 'Import Jobs' where you'll see the job that just ran at the top. Click on the job and you get the results as shown below.
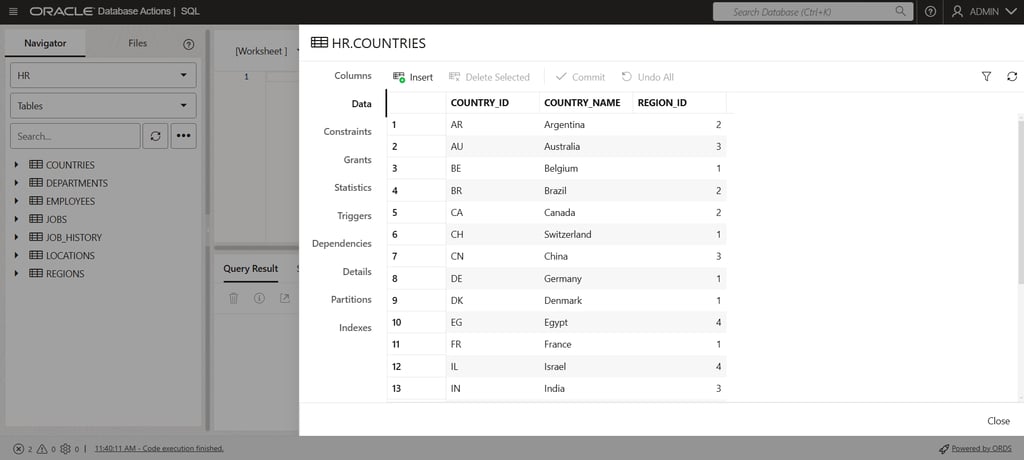
On the OCI console, DB Actions, you can query and view the HR schema as seen below which further proves your import job was successful.
That's it, I hope you found this useful. Thank you.


SQL Developer Data Pump Import
Import Data Pump Dump Files into an Autonomous Database Instance
Austine Ouma
12/27/2024